So, another tutorial series. And this one, bless its heart, wants to teach you how to build a “simple browser-based dinosaur runner game with Deno.” Groundbreaking stuff, I know. We’ve been here before, haven’t we? The setup, the game loop, the collision detection – it’s the same song and dance, just with a slightly different hat. Deno, in this case.
This particular installment, dubbed “Stage 2,” promises to take the skeletal framework from Stage 1 (which, for the record, apparently involved setting up an HTTP server and deploying it, because apparently that’s the real hurdle to game dev) and inject some actual life into it. We’re talking about turning a static page into a dynamic canvas where a pixelated critter can, presumably, run and jump. All powered by Deno, naturally. Because if it’s not Deno, it’s not worth our time in this bleeding-edge world of ours.
Is This Just Another HTML Canvas Tutorial?
The core of this operation, according to the docs, is the HTML5 <canvas> element. Shocking. We’re going to be drawing graphics using JavaScript, adding keyboard and mouse inputs, and wrestling with a “basic physics system” involving gravity and jumping. And then, because we can’t have a modern web dev tutorial without it, we’ll be deploying it to the cloud. Because nothing screams “fun game development” like another cloud deployment.
The project structure itself looks… standard. src/ for server-side code (TypeScript, because of course), public/ for the client-side jazz (HTML, JS, CSS), and the usual Deno config files. It’s clean, it’s organized, it’s exactly what you’d expect. No surprises here. They’re using Deno + Oak for the server, which is fine. It’s a web framework. It serves files. It handles routes. It’s not exactly reinventing the wheel, but it’s functional.
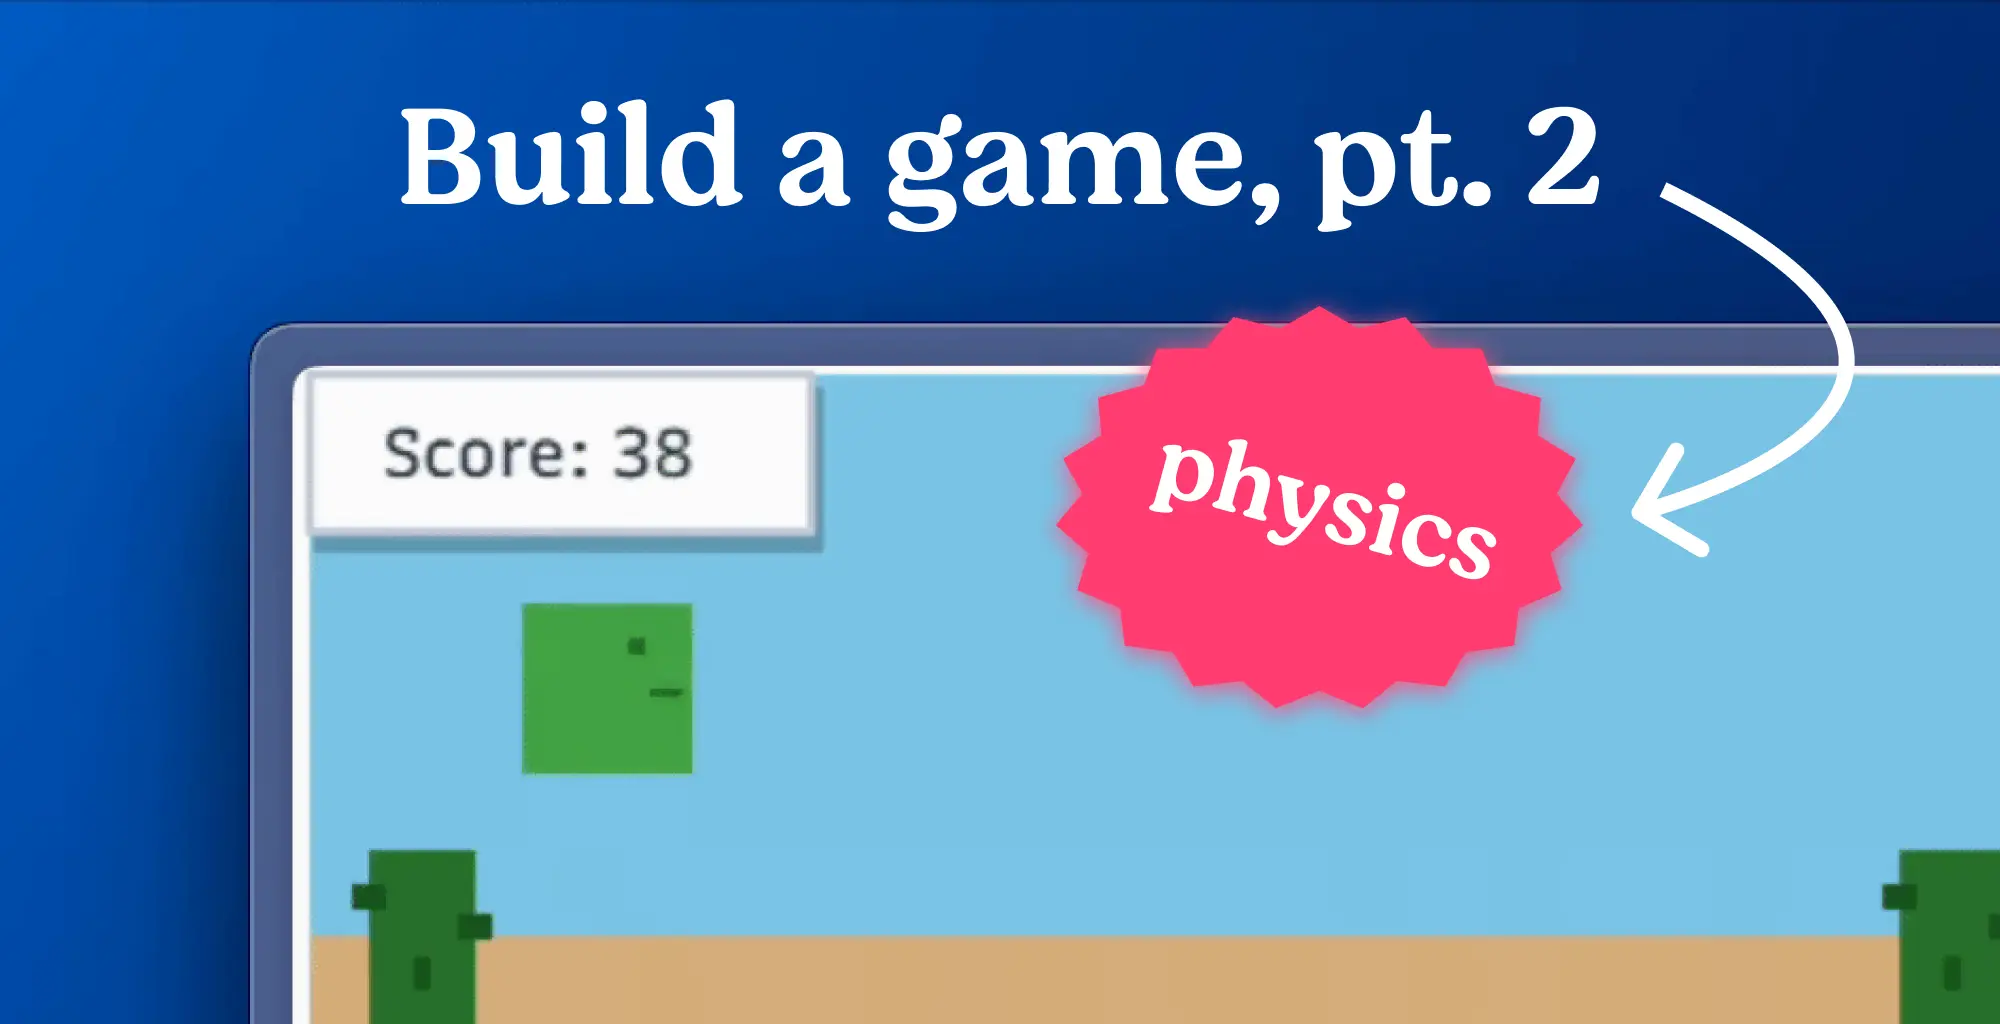
We’ll turn that simple landing page into a moving canvas with a jumping character with keyboard and mouse controls. We’ll also learn about game loops using
requestAnimationFrame.
The HTML gets a <canvas> tag, naturally, with an ID of gameCanvas. Because why would you name it anything else? We’re also layering in some UI elements: a score display and a “Click to Start!” message. All hooked up with IDs so JavaScript can poke at them later. Oh, and instructions. Because apparently, we still need to tell people what keys to press in 2023. Spacebar, Up Arrow, Click – got it. Essential game mechanics, clearly.
And the CSS. Because a blank canvas isn’t quite boring enough, we need some basic styling. :root variables for colors that sound vaguely pleasant – --primary, --secondary, --bg, --dark. Standard stuff. We’re getting SkyBlue fading into SandyBrown for the background. Very evocative. The UI elements get their own boxes with shadows, because everything needs a shadow these days, apparently. It’s all very… functional. It’s going to look like a game, I guess. A very basic, retro-style game.
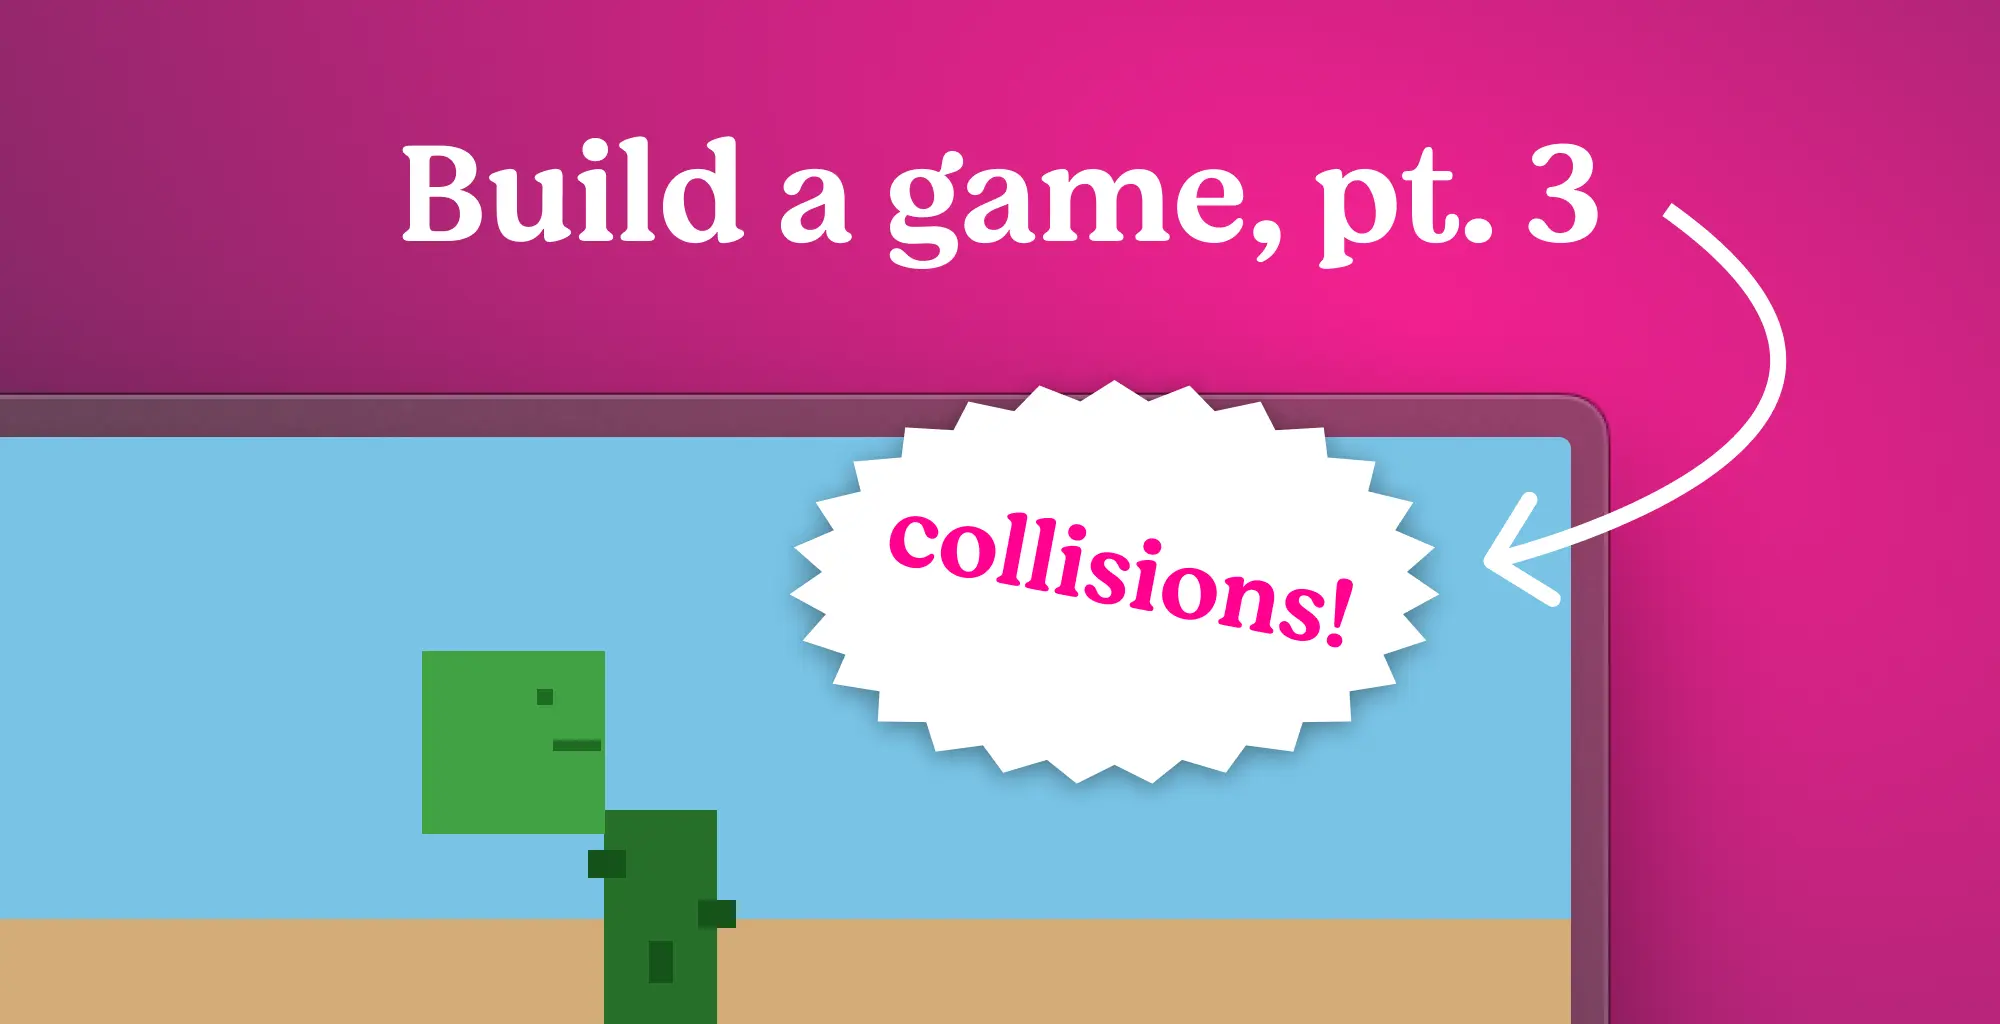
But here’s the thing. While this tutorial is dutifully walking through the steps of getting a canvas to render and responding to input, it’s skipping over the actual why. Why Deno for this? Is it genuinely a better experience than Node.js for this specific task, or is it just another platform to show off? And critically, who is actually making money here? Is Deno hoping this sparks a gold rush of game developers flocking to their platform, or is this just a fun little side project for their own marketing? It feels like a lot of effort for a game that, at this stage, will likely resemble every other browser-based runner game ever made. The real value, as always, will be in how they handle the later stages – the leaderboards, player profiles, and live tuning. That’s where the actual developers might see some utility beyond just learning a new syntax for a familiar task.
Bringing the Game to Life with the Game Loop
The heart of any game, simple or complex, is the game loop. This is where the magic happens – the constant cycle of updating the game state, rendering the graphics, and processing user input. Deno, like most modern JavaScript environments, uses requestAnimationFrame for this. It’s the browser’s way of telling you, “Hey, I’m about to repaint the screen, give me your stuff to draw.”
This means you’ll be writing JavaScript in public/js/game.js (or .ts, if you’re feeling adventurous and have Deno’s TypeScript compiler set up). This script will be responsible for everything: drawing the player, the ground, the obstacles (which are coming in Stage 3, naturally), and updating the score. It’s a lot of responsibility for one file, but that’s how these simple games work.
Controls, as mentioned, are handled here. Spacebar for jump. Up arrow for jump. A click to start. Standard fare for a Chrome Dino-like experience. The physics, a simple gravity pull with an upward velocity for a jump, will dictate how your character moves. It’s not going to be Cyberpunk 2077 physics, but it’ll get the job done for a runner game.
By the end of this stage, you’ll have a canvas that… well, it’ll probably still look pretty basic. But it’ll be moving. It’ll be interactive. And it’ll be deployed. So, a step up from Stage 1, I suppose. The real question remains: can Deno make this process demonstrably better, or is it just another tool in an already crowded toolbox?